OpenWater provides customers a convenient way to send blast emails to their applicants through our Email Wizard feature. Some examples of email blasts include sending reminder emails to applicants with incomplete submissions, notifying winners and non-winners, and reminding judges to complete their assignments.
Navigate to your program
To send an email blast, first navigate to your program.
Find the program you'd like to send the email blast from, and click Configure Program.
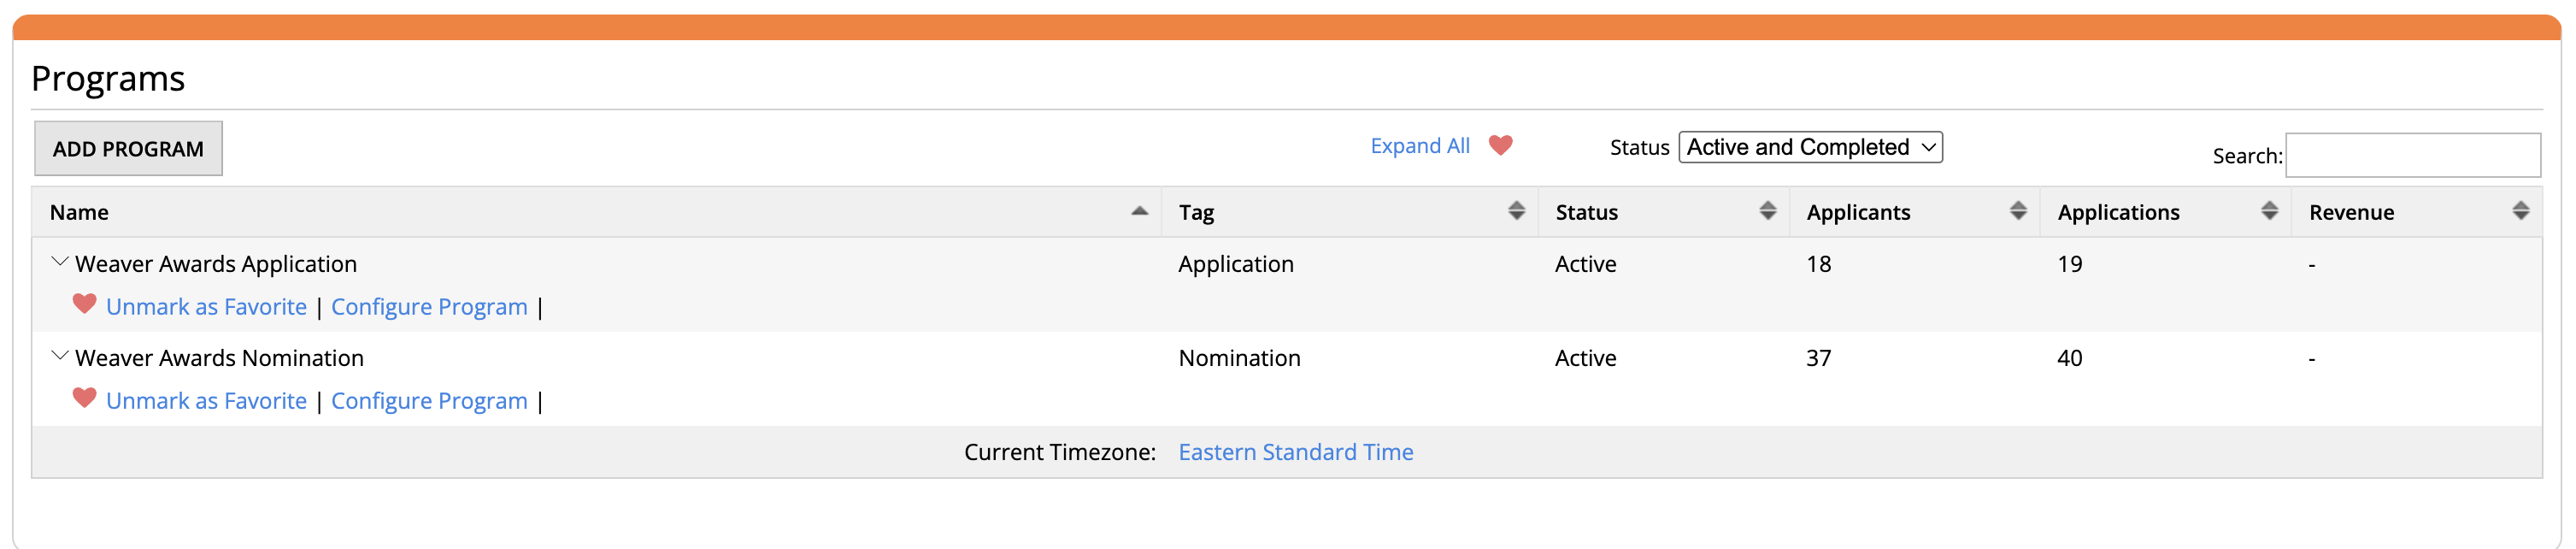
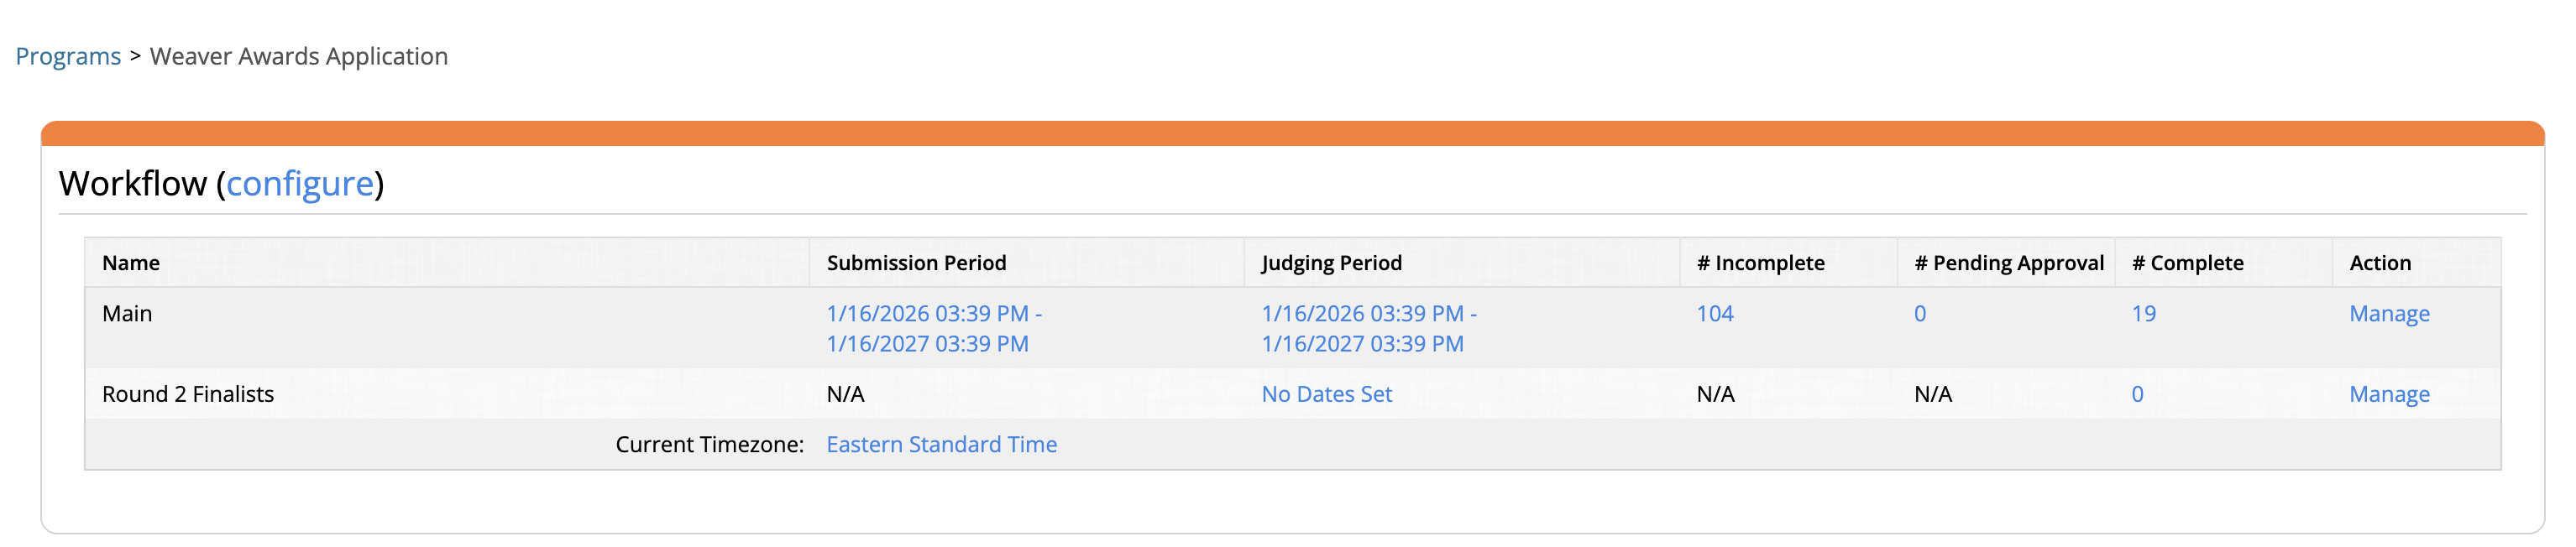
Next, you can select the round you'd like to enter by clicking Manage on the right hand side.
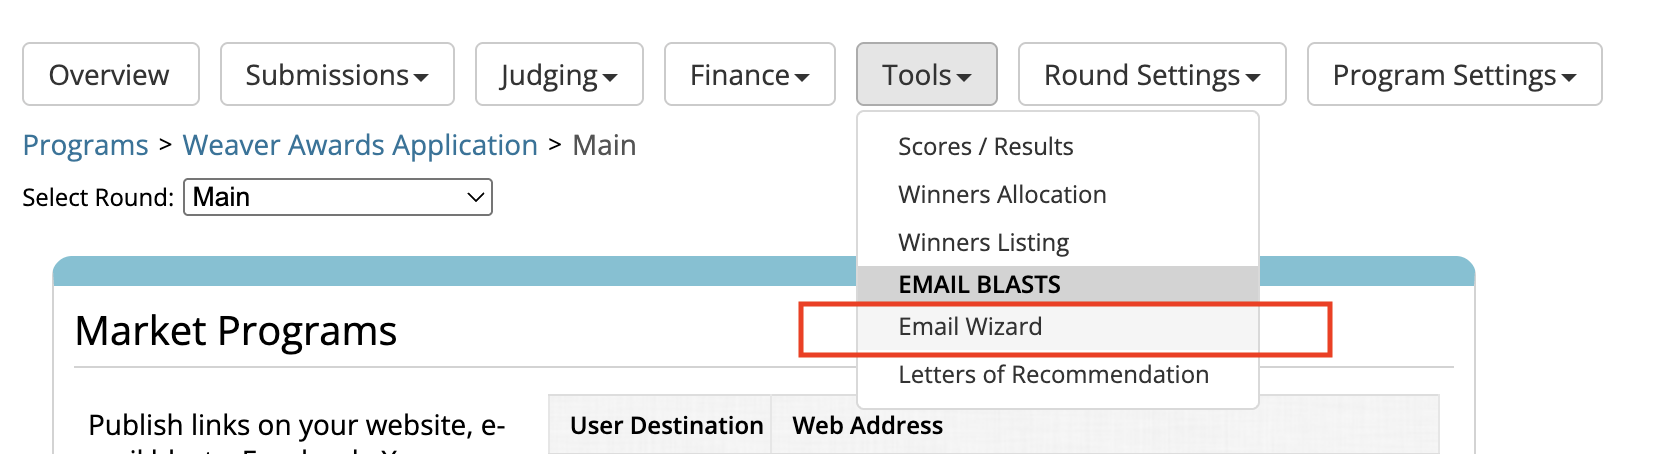
Under the Tools drop down menu, click Email Wizard.
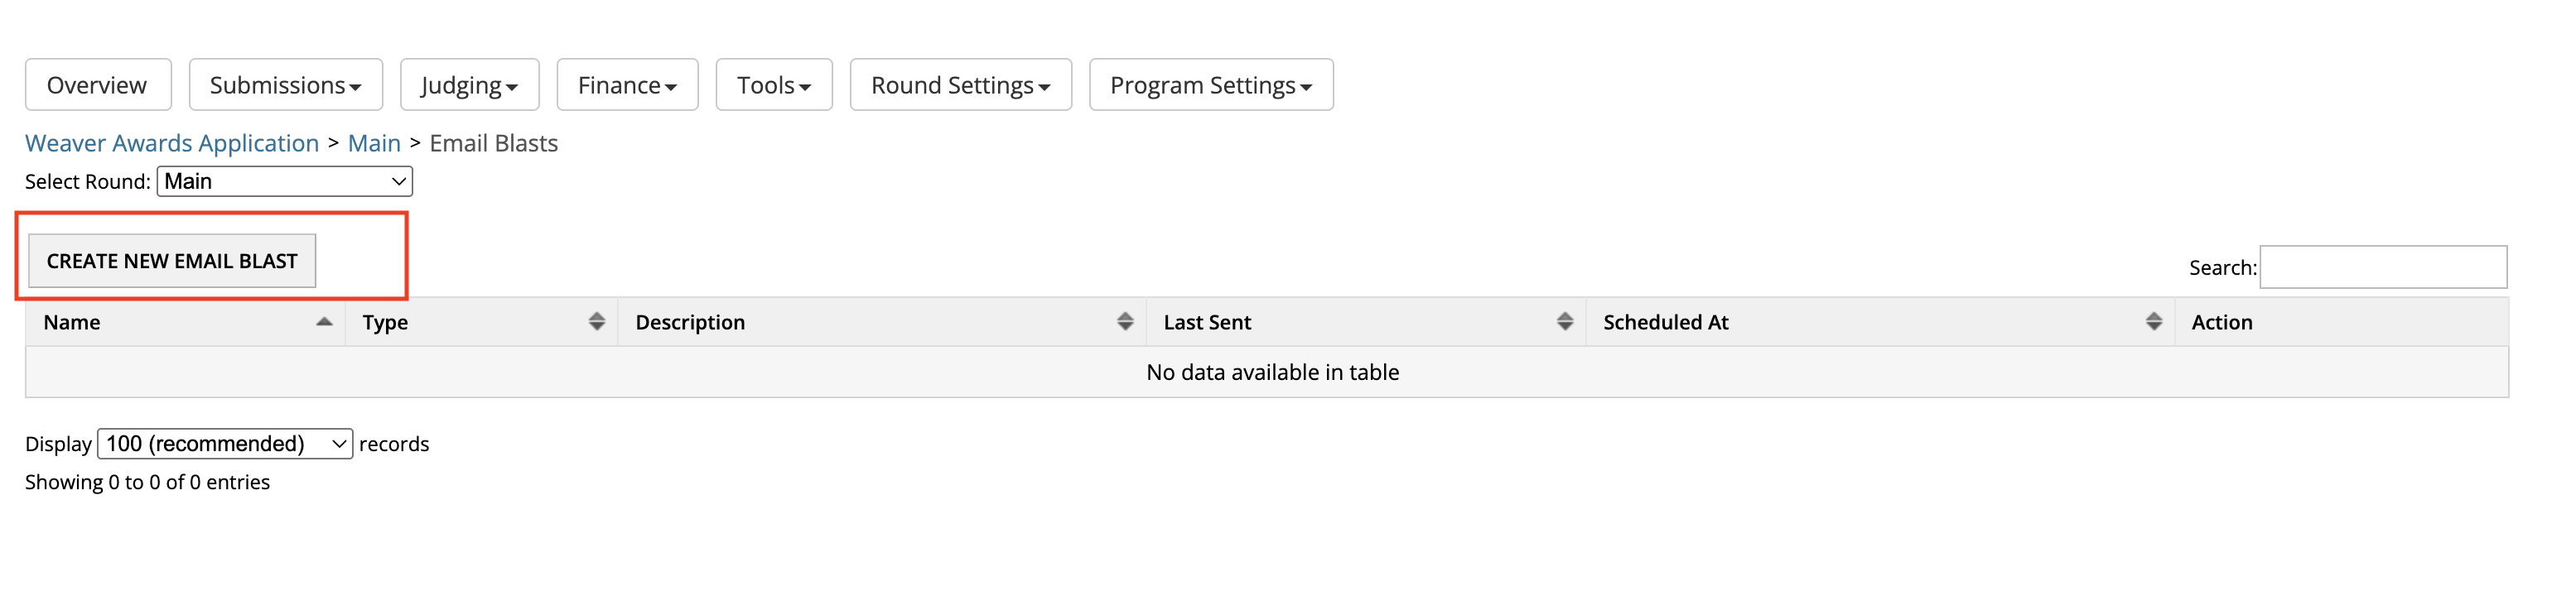
Click Create New Email Blast.
One Email Per Submission vs. One Email Per Applicant
On the next screen, provide a name for this email blast so that you can reference back to it at a later time.
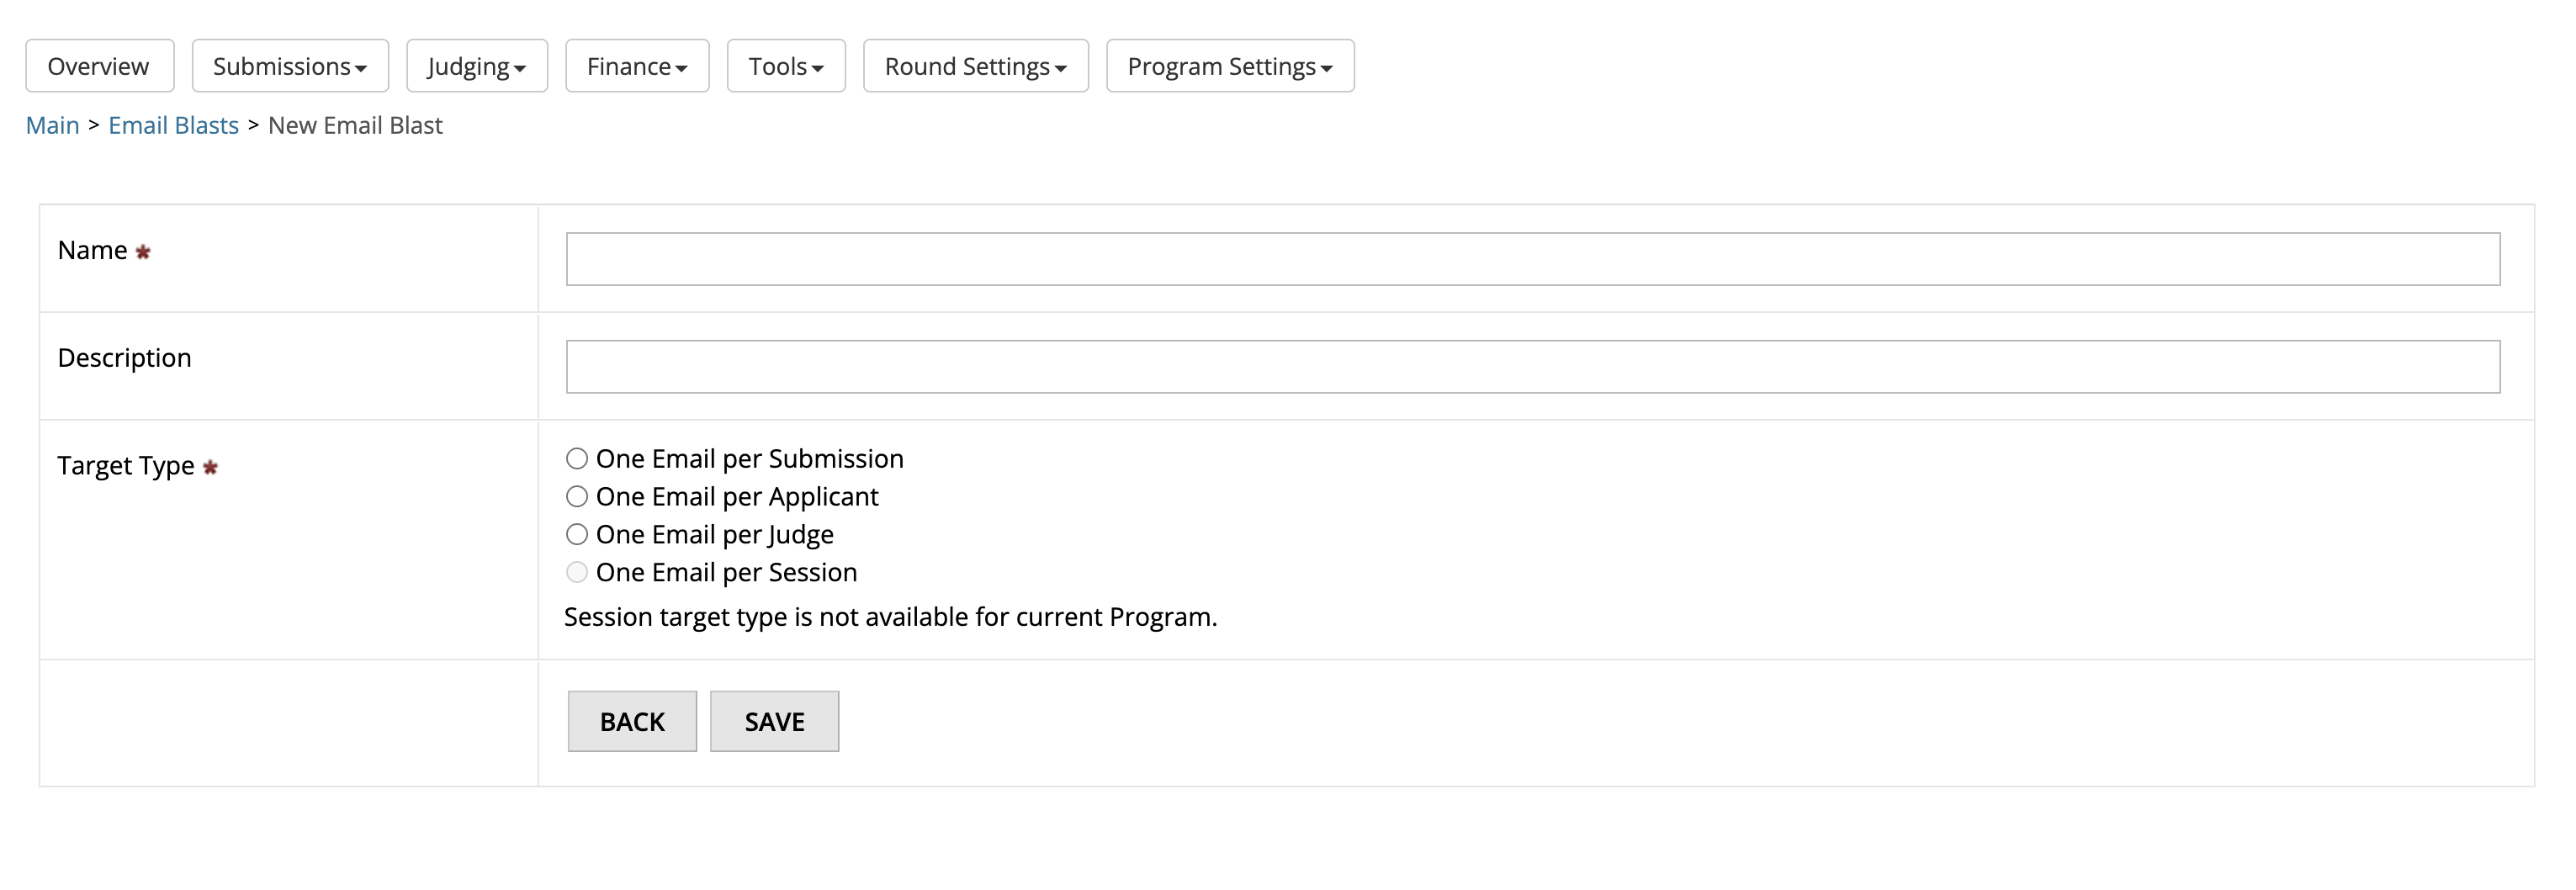
If you choose One Email per Submission, this will send out one email to each submission that meets that criteria. If an applicant has multiple submissions that meet that criteria for the email blast, they will receive multiple emails.
Some customers prefer One Email per Applicant as a result. For example, if you are sending a reminder email blast to applicants to have Incomplete or In Cart submissions, they receive one email only regardless of how many incomplete submissions they have.
To choose the option that is most applicable to this email blast you are creating.
Click Save and you will be presented with this screen.
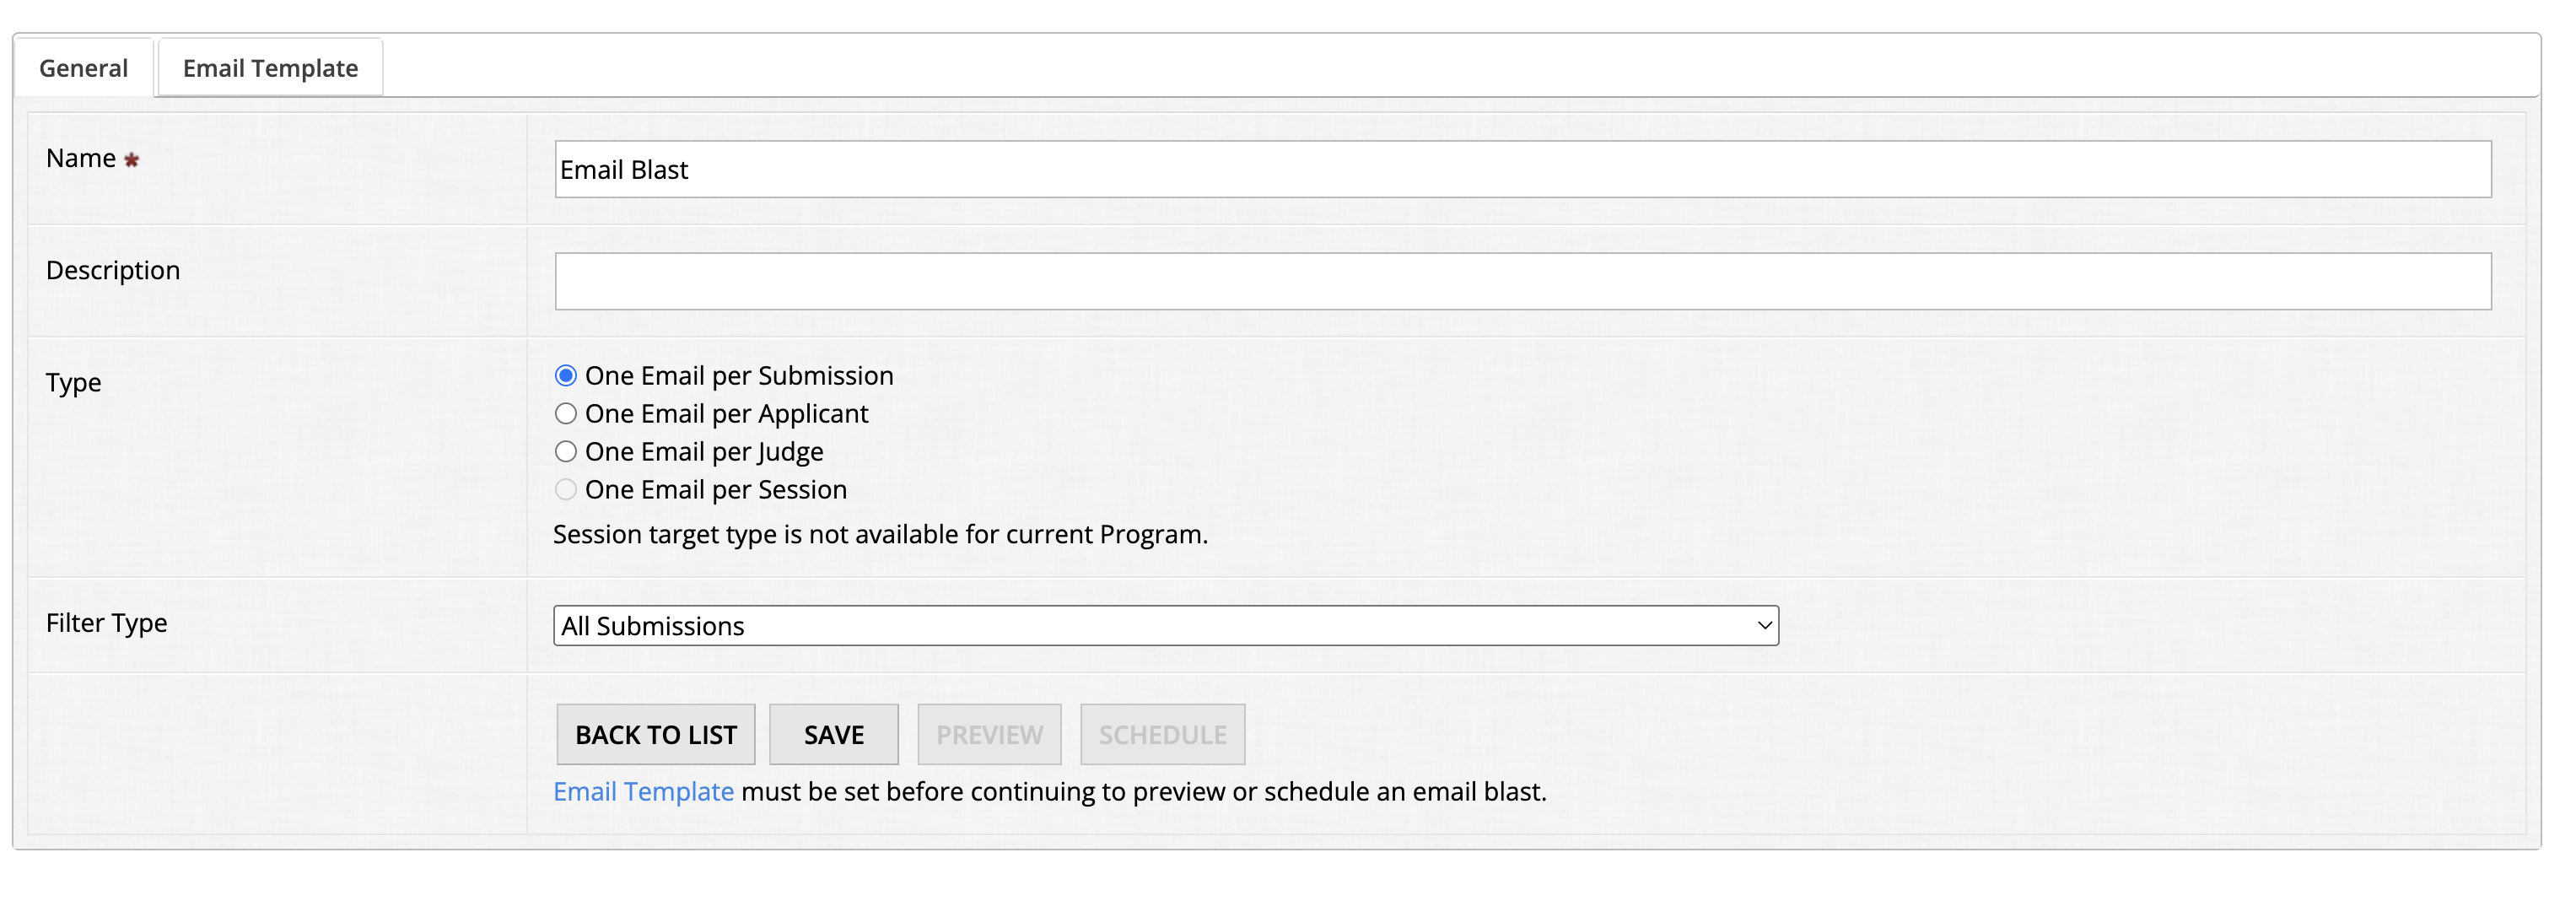
Filter Types
Depending on the type of email blast you have selected, different canned Filter Types become available. In the One Email per Submission, you can choose from the below options:
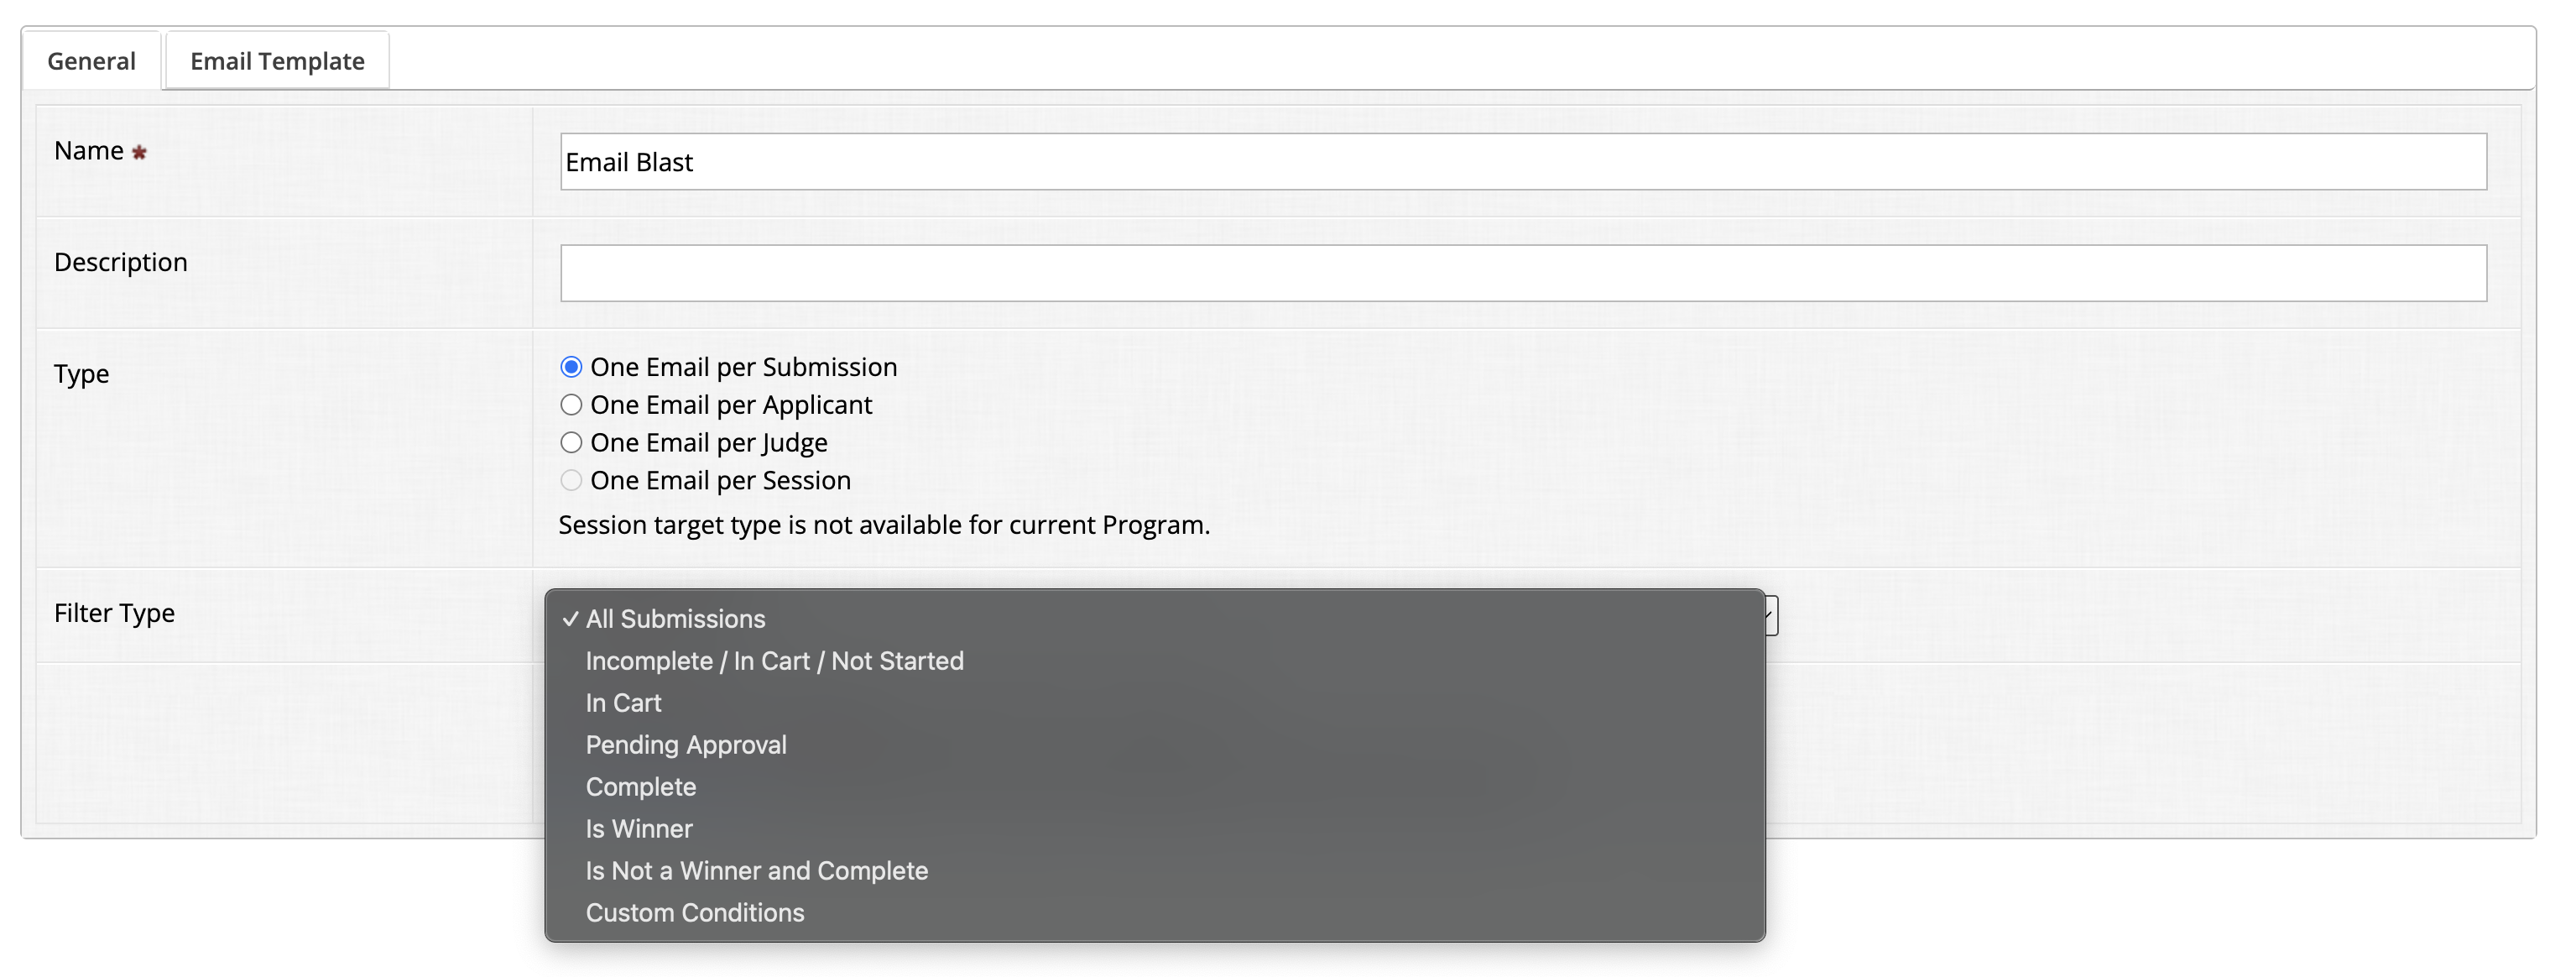
If none of the canned filters are sufficient, you can choose At Least 1 Submission matches Custom Conditions or All Submissions match Custom Conditions which would allow you to create any kind of filter that you need.
Click Save.
Email Template
Tab over to Email Template and complete the fields to design your email blast. Use Insert Variable to personalize the message.
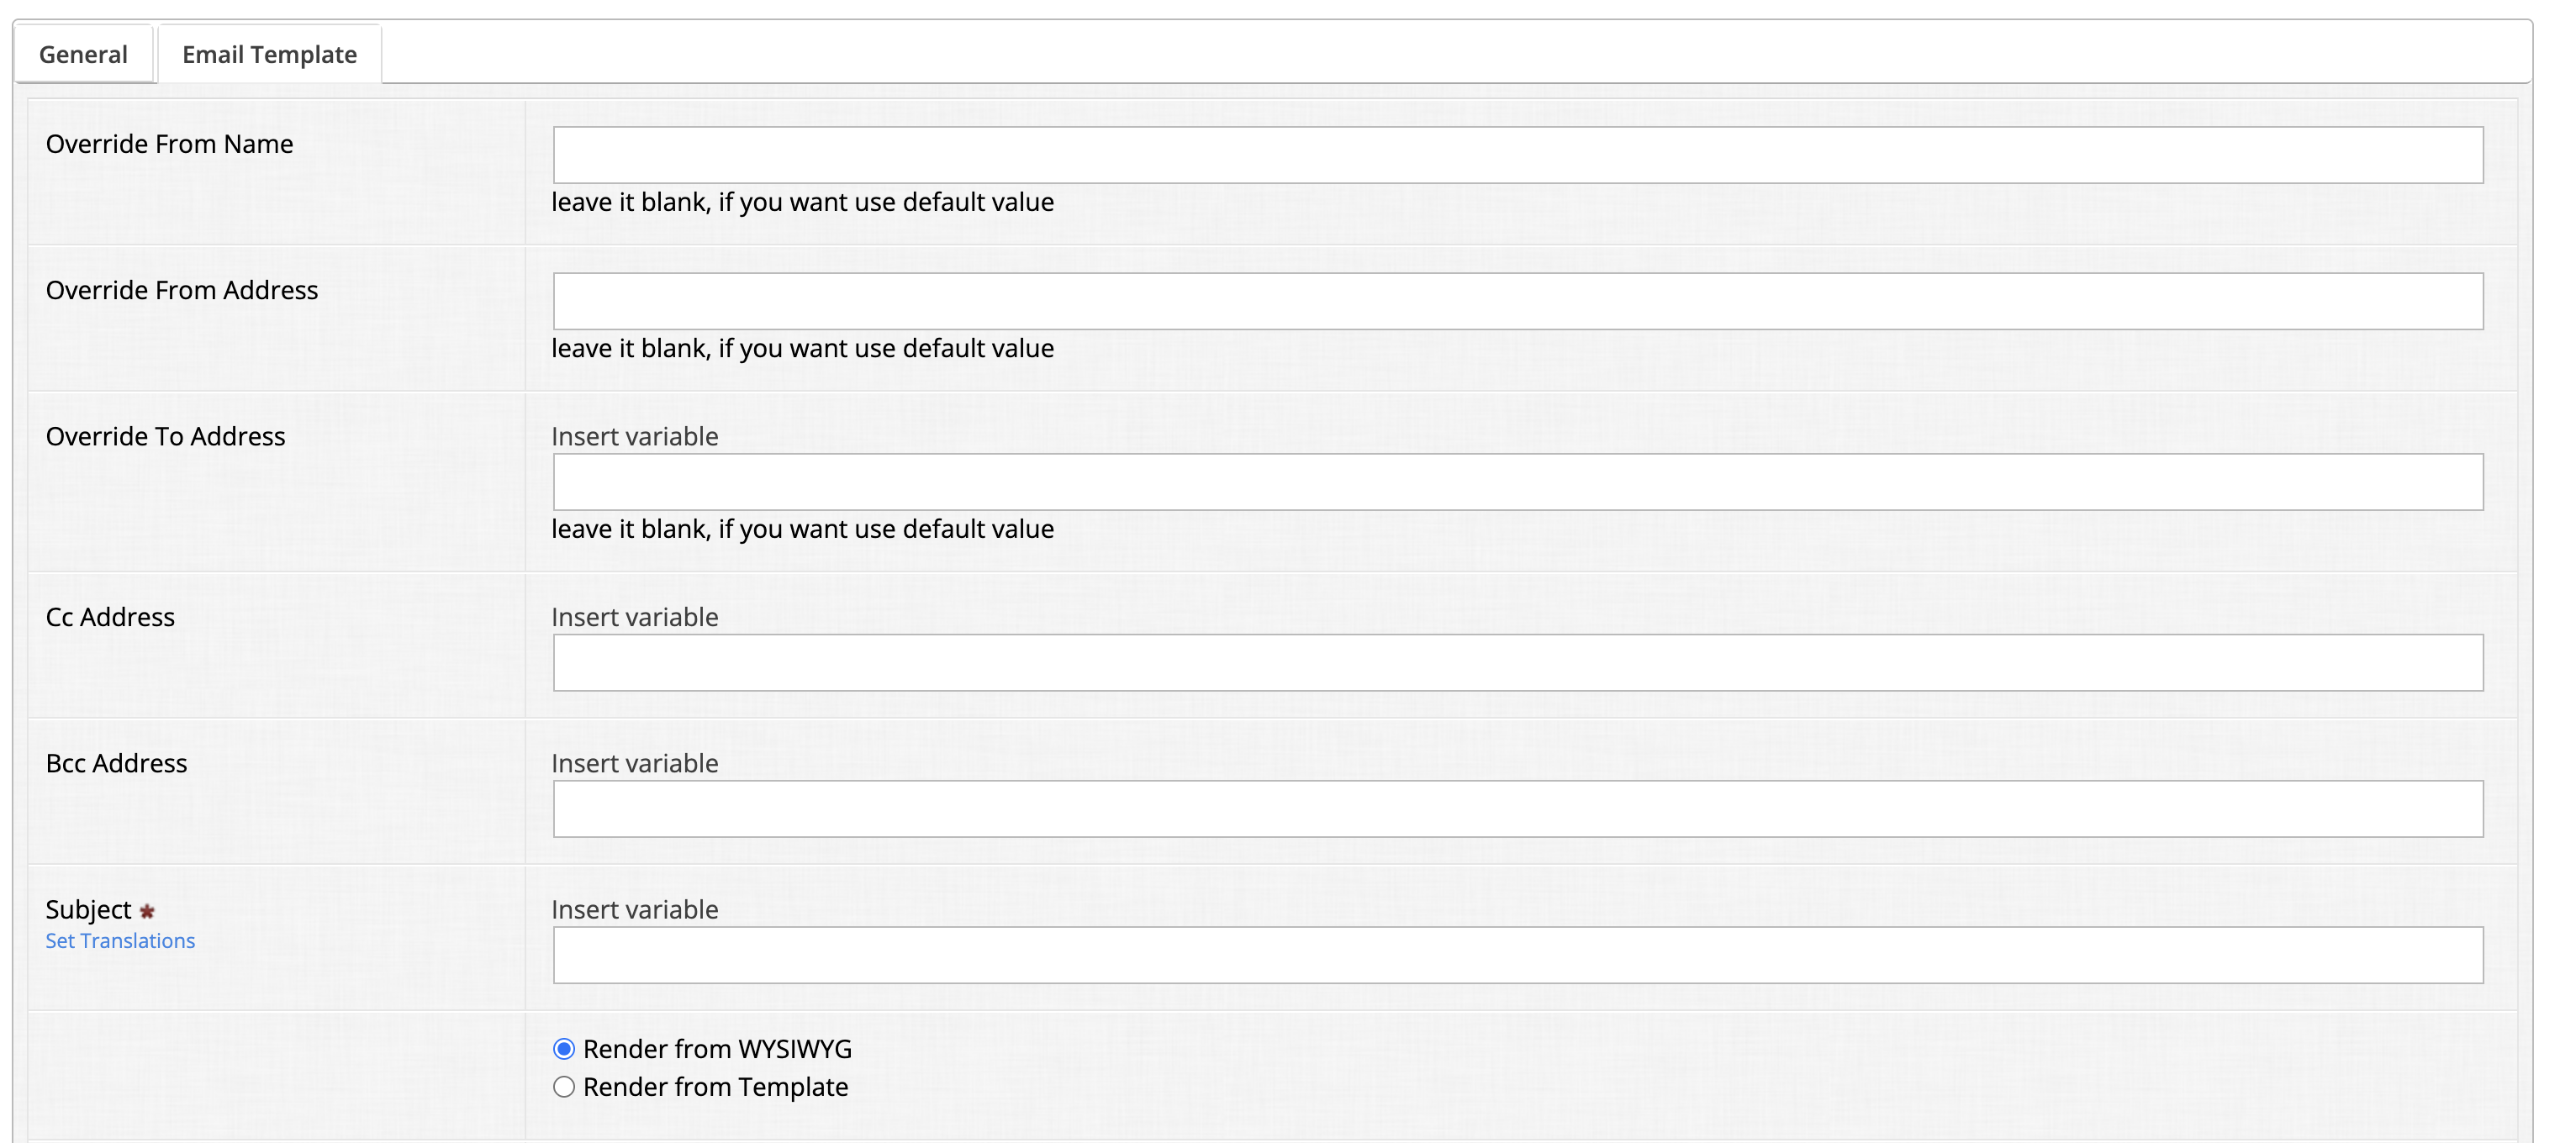
Note: the Subject Line is the only field that is required in this section.
Override From Name will default to the value set in your "Organization Information" tab
Override From Address will default to the value set in your "Organization Information" tab
Override To Address will default to the value of the which the email blast conditions are set. (For example: If we're sending this email blast to applicants - then the default is the applicant's email. If we're sending this email blast to judges - then the default is the judge's email.)
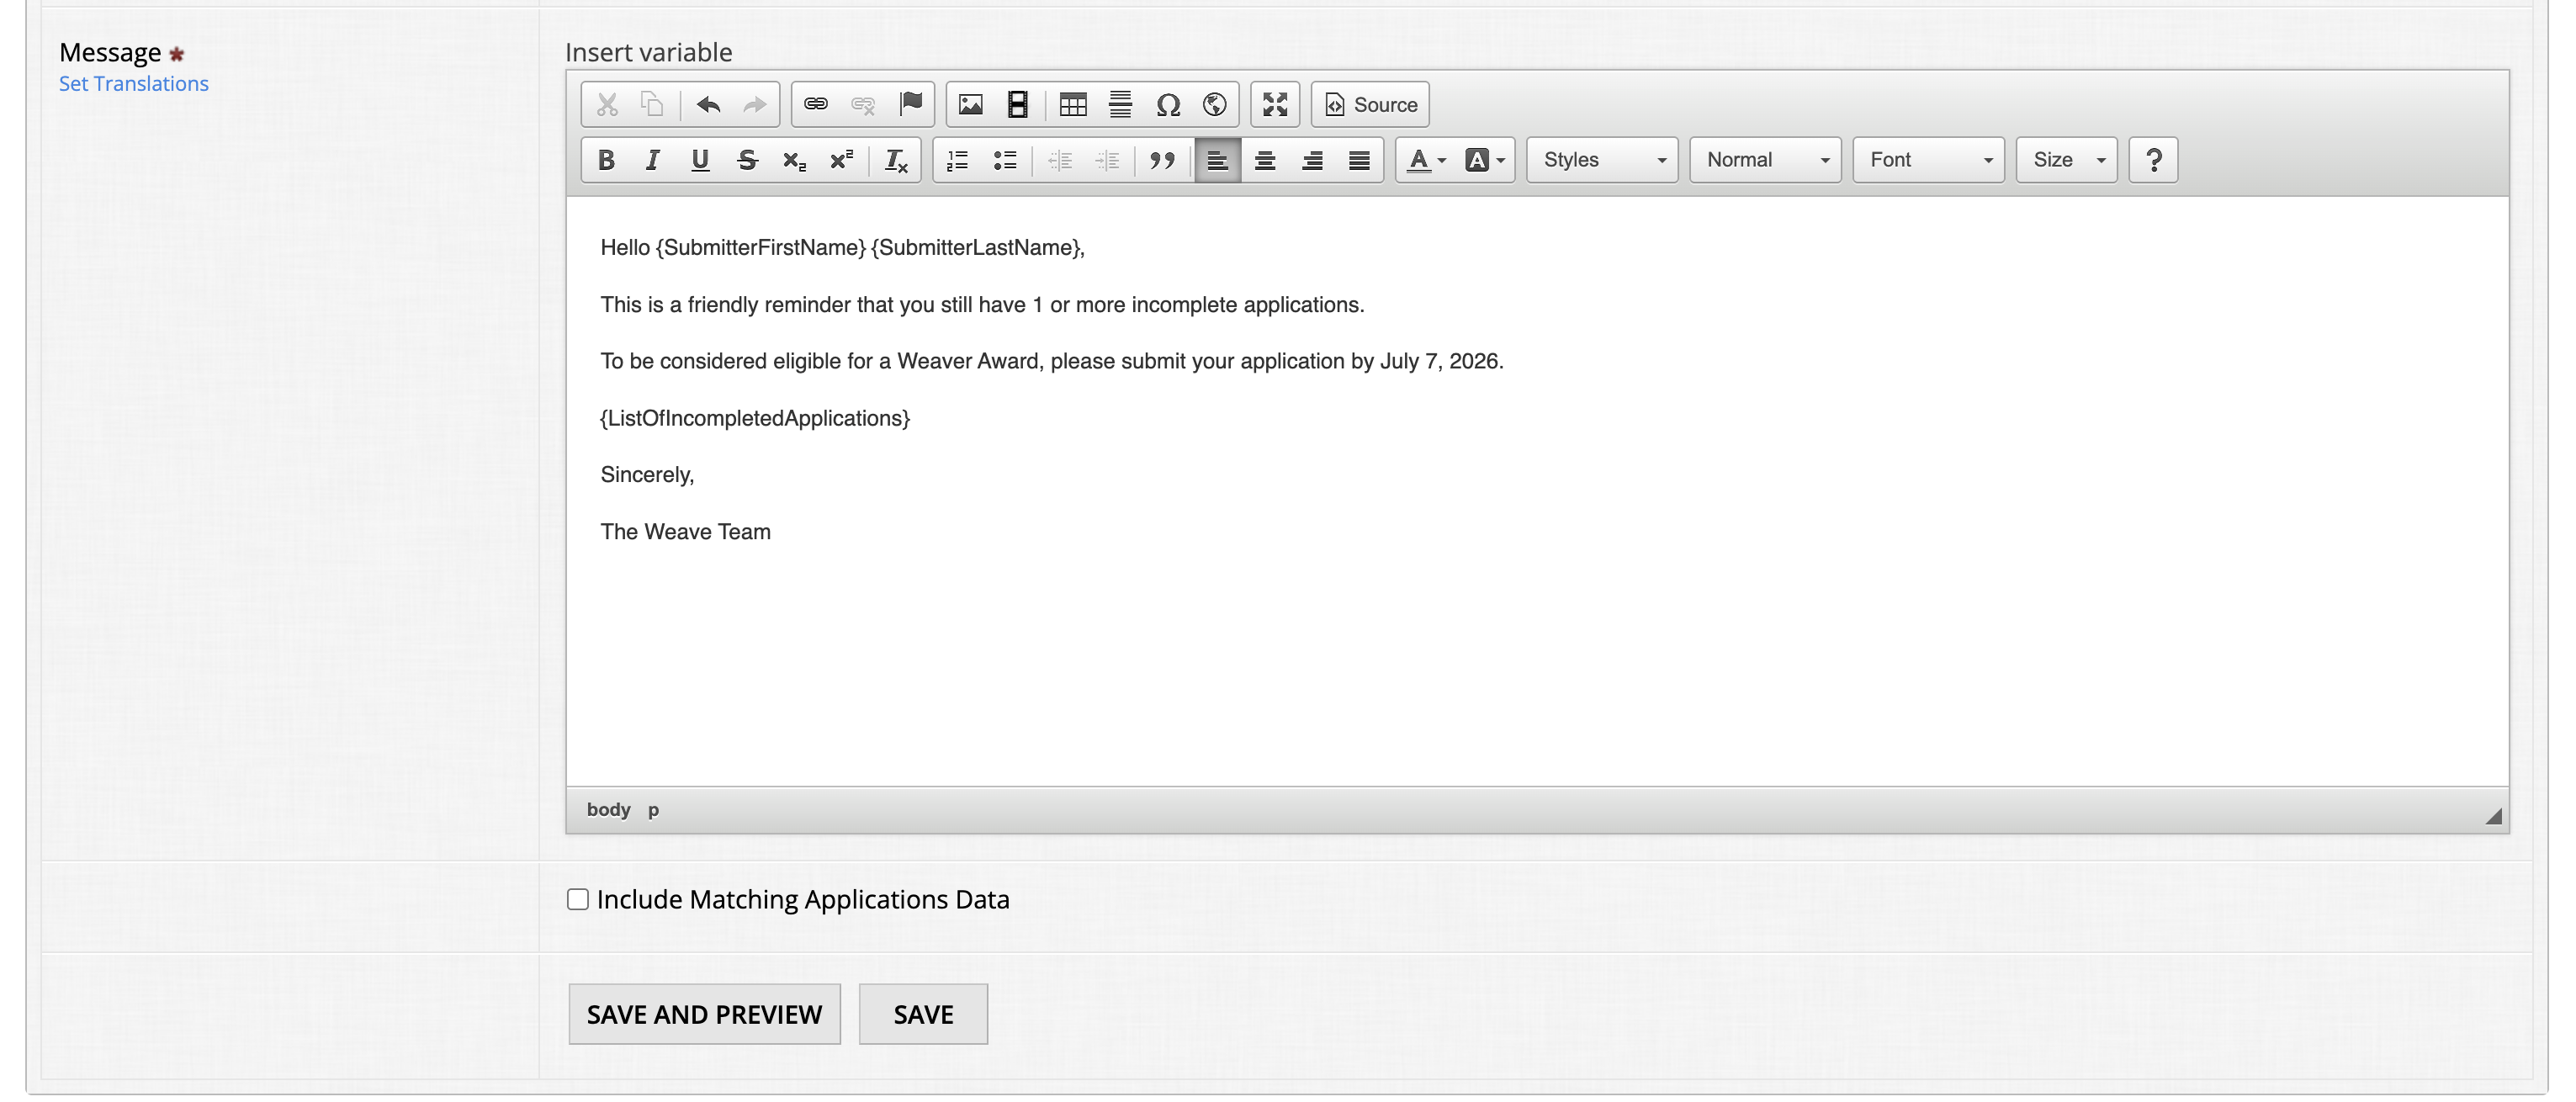
Scroll down, you will see the Message portion. Here you can configure the message as you wish.
Insert Variables
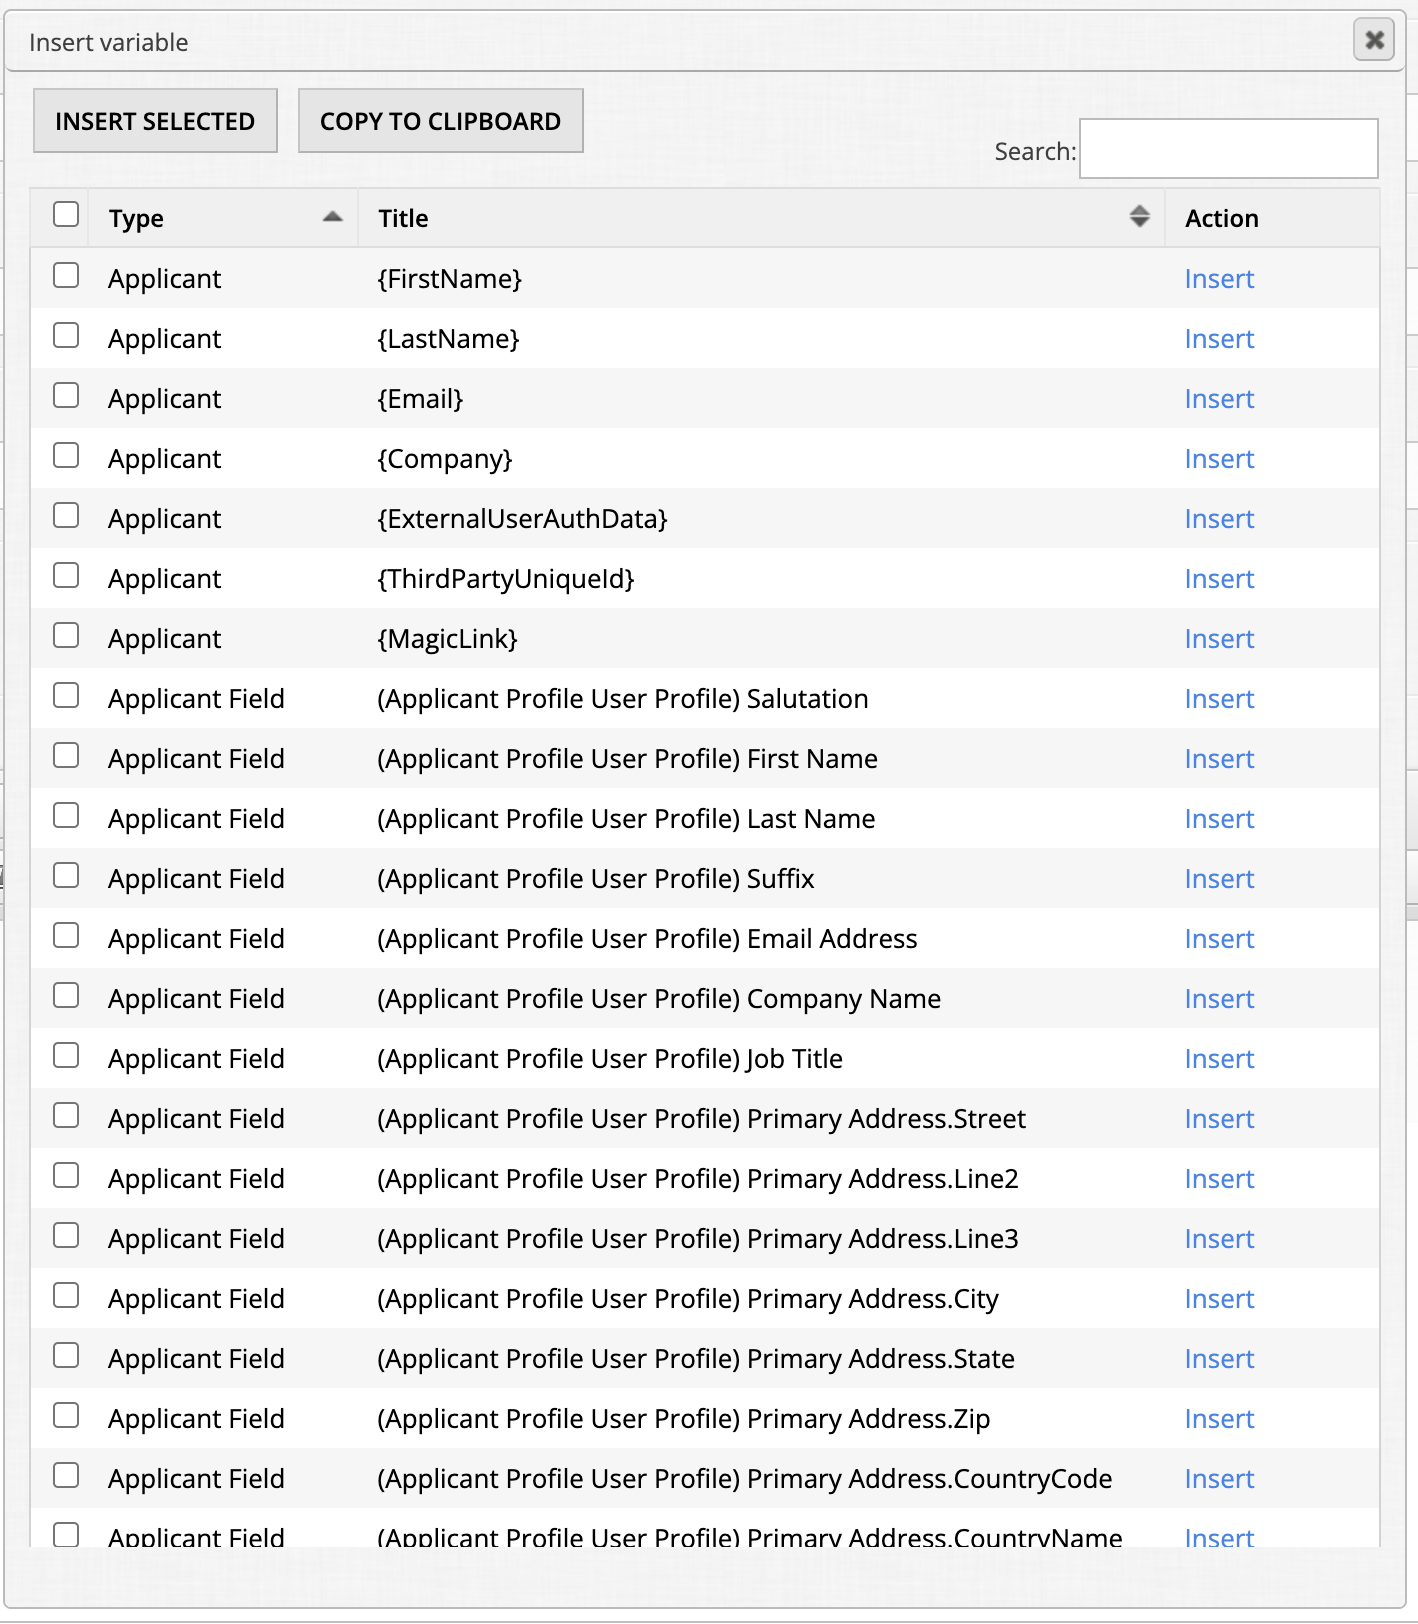
If you want to personalize your email message, you can click Insert Variable along the top of the text box.
We have a variety of variables to choose from. They are sorted by Type (in the left hand column) so you can tell where the variable lives within the system.
Take note of the Search box. It's useful when you don't want to look through all of the variables.
You can check off multiple variables using the checkbox (on the left side of each line), and then click Insert Selected at the top to insert all of the variables.
If you only need one, you can just find the variable and hit Insert.
Once you're happy with your message, click Save and Preview.
If you've selected an Applicant (aka Submitter) type email blast, an additional option appears below the Message content box: Include Matching Applications Data.
This feature lets you include data from multiple submissions in a single email — useful when an entrant has more than one submission that meets your conditions. You can display fields like entry number, title, and question responses for each matching submission.
To use it, check the Include Matching Applications Data box to reveal the Matching Application Data Template field. Edit this field using the WYSIWYG editor and use Insert Variable to select the submission fields you want to display. Then insert the Matching Application Data variable in the email body where you want that information to appear. The system will repeat those fields for each qualifying entry.
Preview
On the next screen, you can preview what the email may look like to a typical applicant. You can download the matches to excel to verify the recipient list. Email yourself a test by clicking Email Me Preview. To send the message right away, click Send Now. If you would like to schedule the email blast to be sent at a future date, click Schedule.
Based on your conditions, the system will find all of the "matches" who will serve as the recipients of your email blast.
In this example, we have 95 matches. You can click on "Download Matches" to download an Excel sheet if you'd like to double-check that the email will reach the appropriate people.
The preview will grab 1 match and populate their details into the inserted variables for you to review.
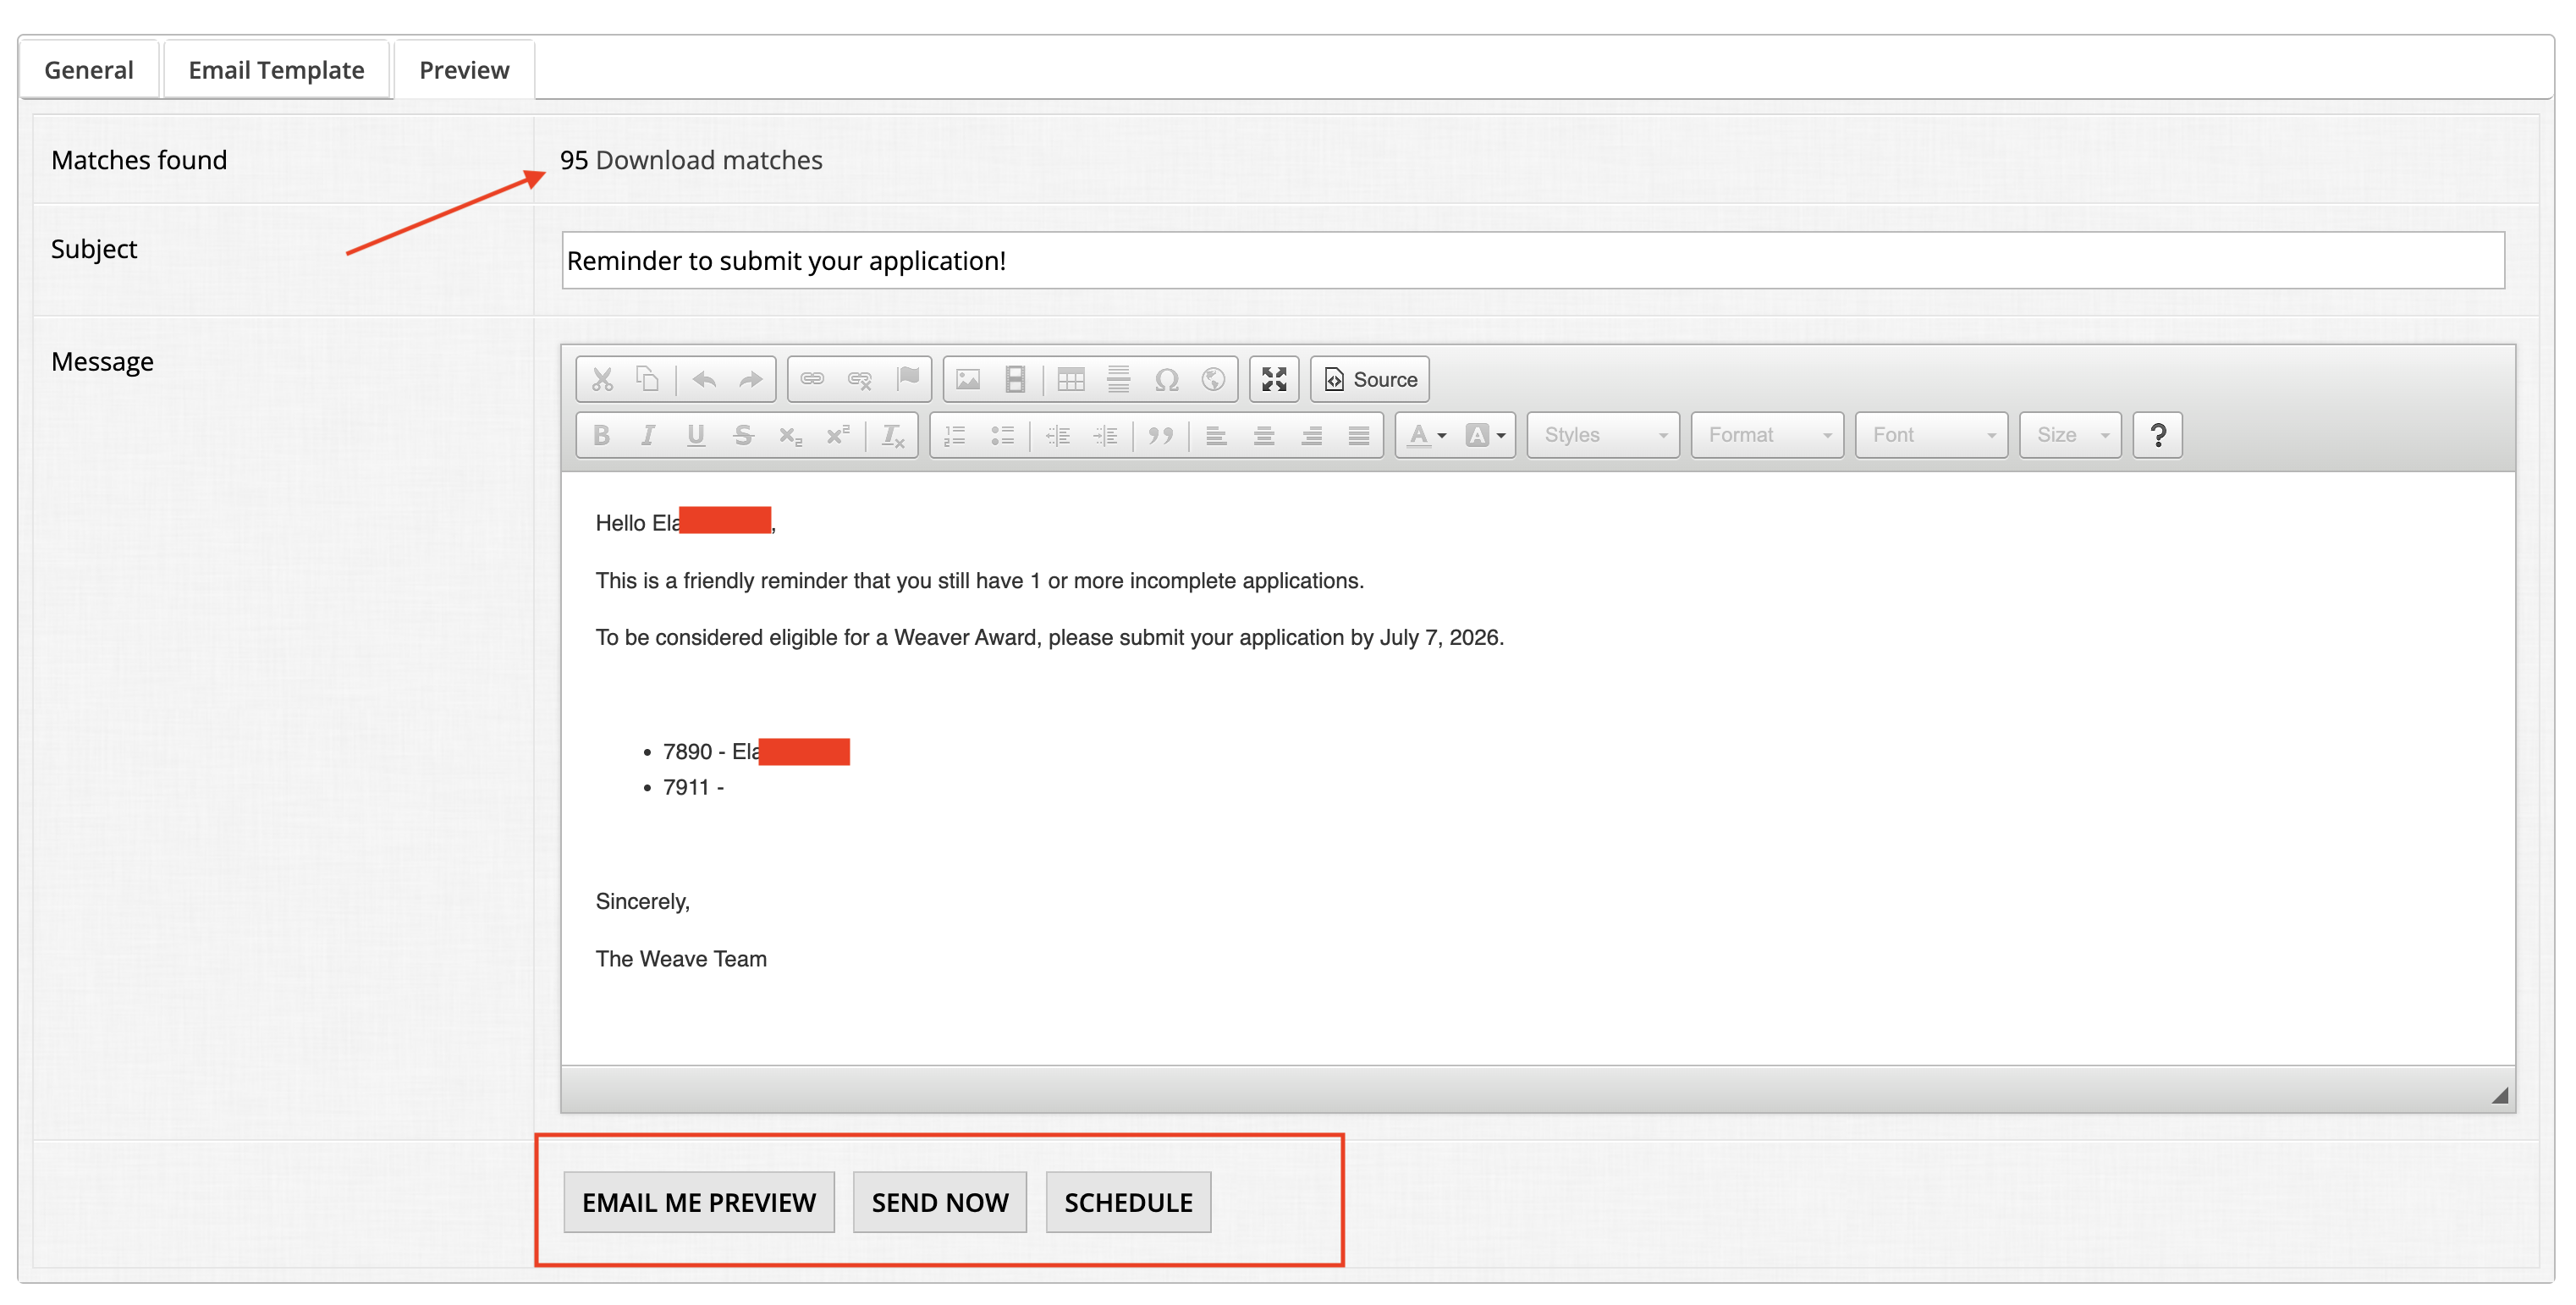
Once you're satisfied with the result, you have three options:
Email Me Preview: this option will email you a copy of the email.
Send Now: this option will send this email out immediately.
Schedule: you can schedule this email for a particular time/day.
And now you've set up your first email blast!